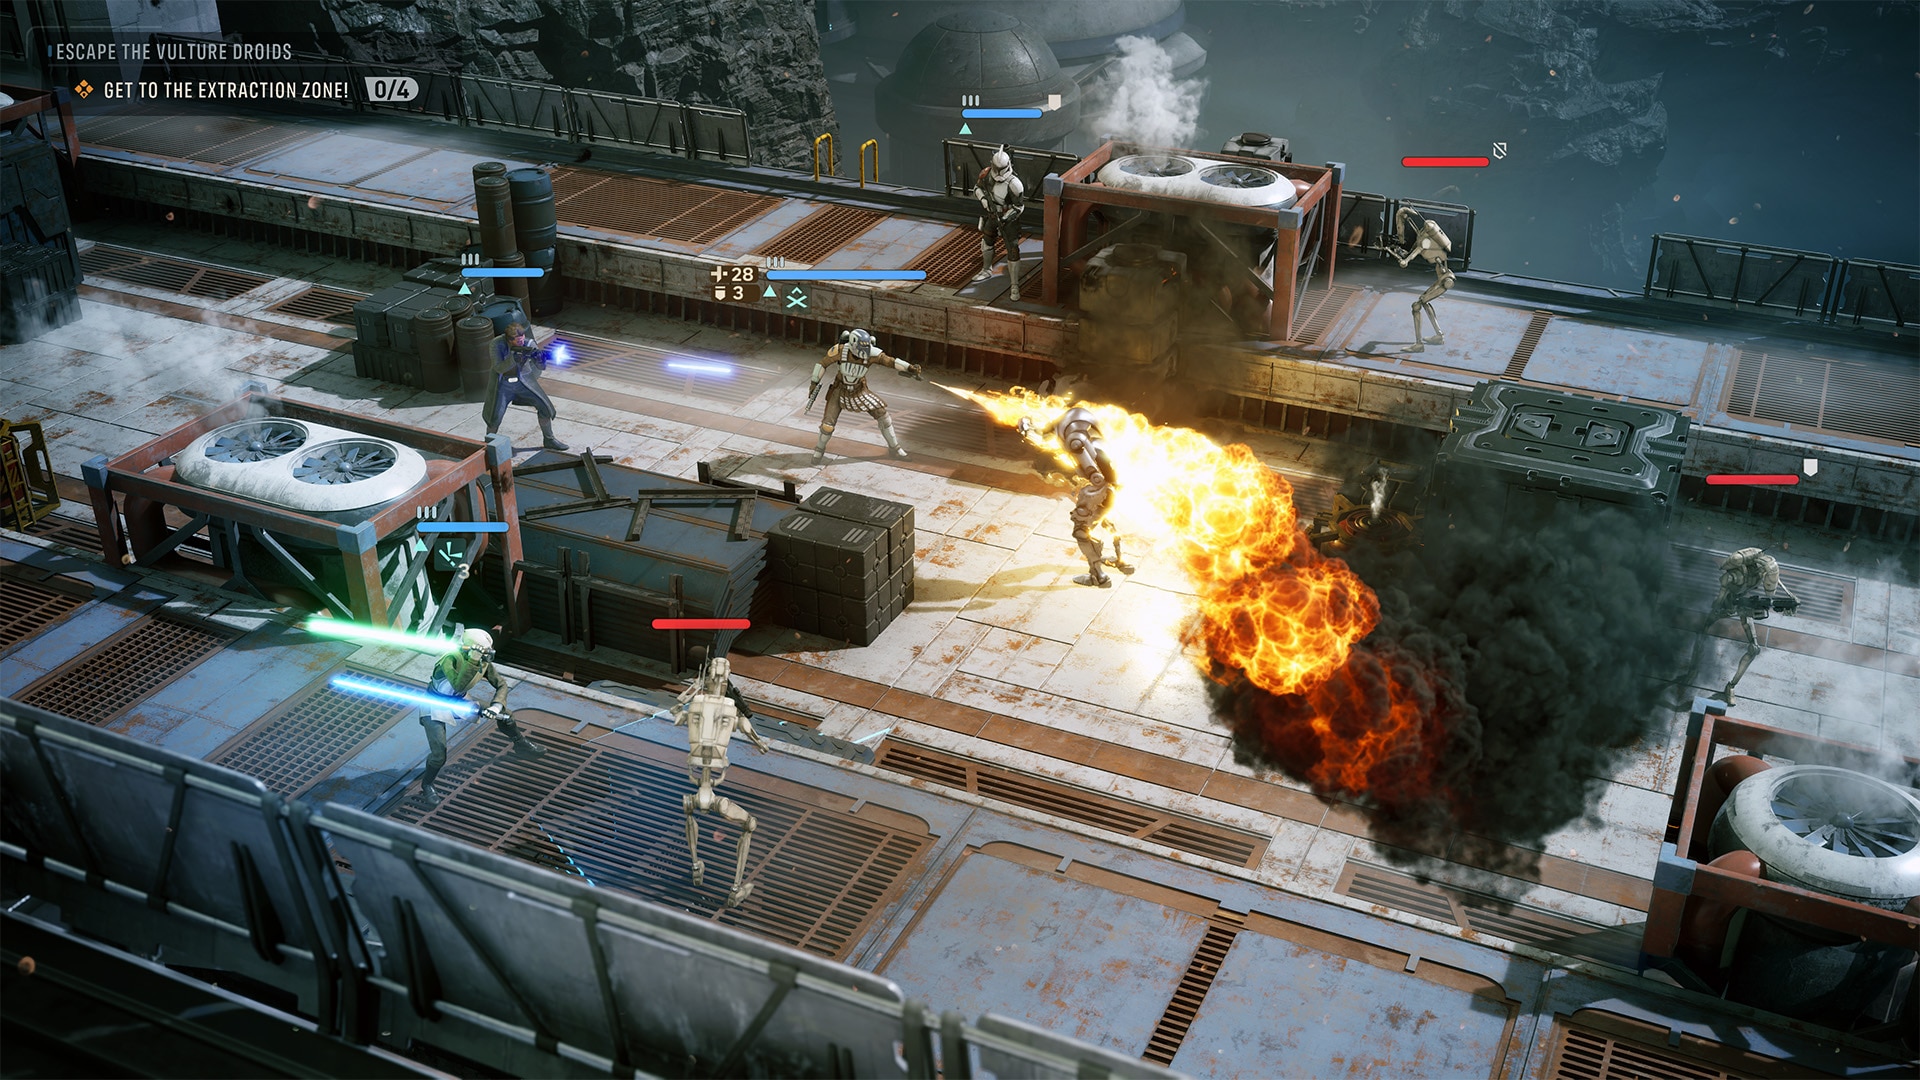
The short combat answer
Use movement only when it improves the shot or protects the next turn. Each Operator has three AP, so check the full squad before spending a final action on Overwatch or ending the turn.
This launch archive separates confirmed official facts from editorial tactical advice. Unverified ability values, mission rewards, exact enemy statistics and definitive tier lists are not invented.
Three AP per Operator
Your entire squad acts in one shared turn, but each Operator has three AP. Movement distance, attacks, abilities, utility items and Overwatch can have different costs. A free Call for Backup action can be used once per turn by the selected Operator without reducing AP.
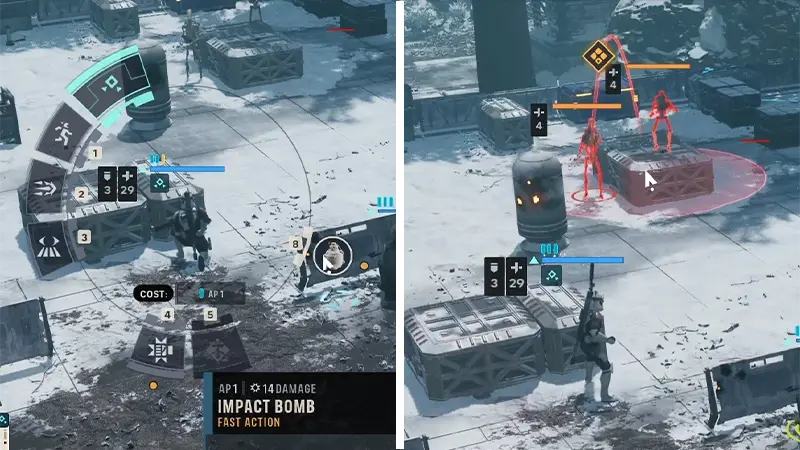
The Impact Bomb preview shows a one-AP utility action and highlights the enemies inside its blast area.
EA Help · Open official guide ↗Improve the shot before taking it
Chance-to-Hit changes with distance, weapon range, line of sight, cover and positioning. Open the Shot Breakdown, then compare the current shot with one legal move. Flanking, high ground or moving into the weapon’s intended range may be worth more than firing twice from a weak line.
If the current shot already solves the priority target, attack first and use remaining AP to return to cover.
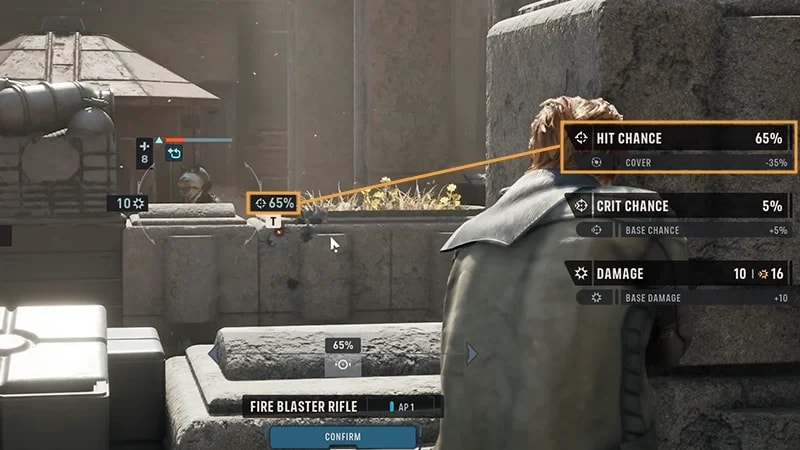
This official example shows a 65% hit chance and identifies cover as a negative modifier before the shot is confirmed.
EA Help · Open official guide ↗Cover protects a position, not a whole plan
Partial cover reduces the enemy’s hit chance; full cover provides more protection. Some cover can be destroyed, so keep a second route. Overwatch watches a selected area during the enemy turn and automatically attacks when a target moves or acts there.
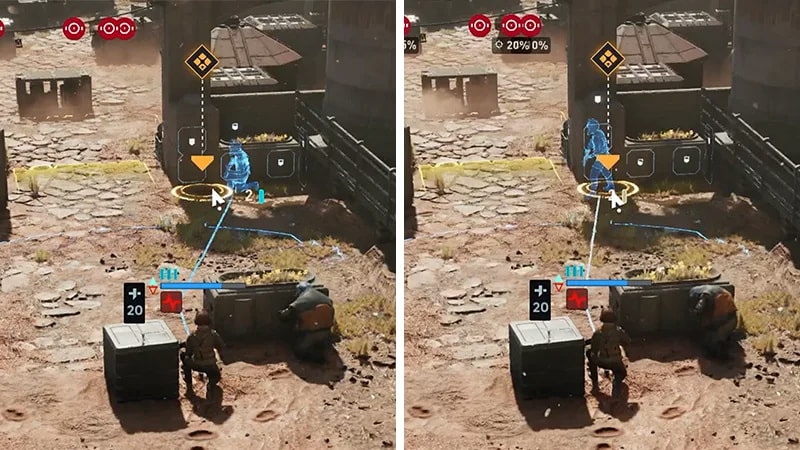
Partial and full cover are shown directly on the movement preview, so compare the destination before spending AP.
EA Help · Open official guide ↗- 01Break enemy Overwatch
Do not walk through a reaction cone without first removing or disabling it.
- 02Move the exposed Operator
Improve position before spending the shot if the current line is poor.
- 03Finish with Overwatch
Place the cone where movement is likely, because the action ends that Operator’s turn.
Advantage is the squad’s reserve
Damaging an enemy earns one Advantage, and the shared pool can hold up to ten. Advantage powers special actions without AP, so it can still rescue a turn after normal points are spent. Save it when the current fight is stable; spend it when a dangerous target or collapsing position must be solved now.
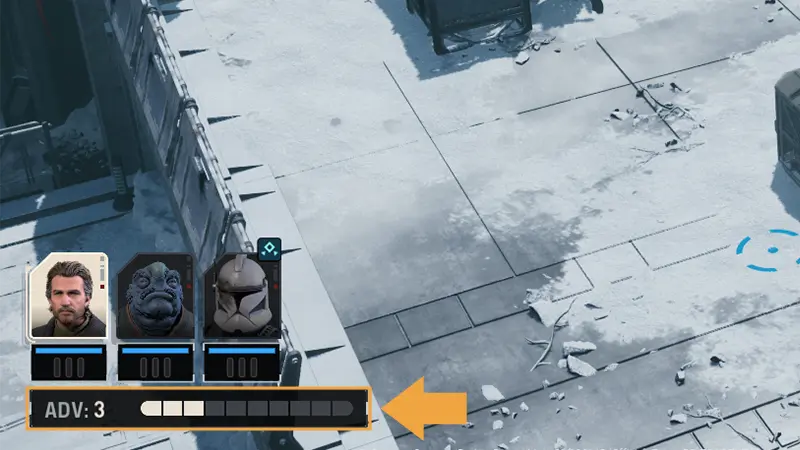
The meter sits beneath the squad portraits and shows the current shared pool—in this example, three Advantage.
EA Help · Open official guide ↗Rally before injuries become a campaign loss
A Downed Operator cannot act until a teammate uses Rally. Being Downed also causes an Injury. With permadeath enabled, three injuries remove that Operator from the squad permanently. Hawks is different: if Hawks is defeated, the mission fails immediately.
Permadeath is chosen when the campaign starts and cannot be changed for that campaign. If that rule is not the experience you want, change it before selecting Start Campaign.
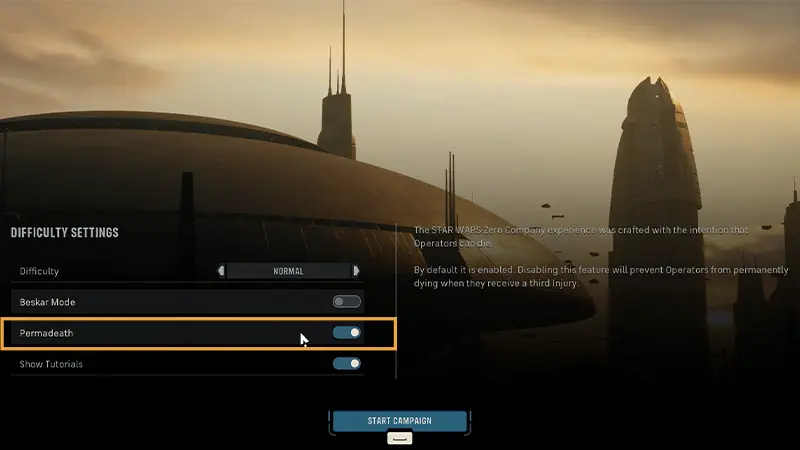
The option is part of the initial Difficulty Settings screen and remains fixed for that campaign after Start Campaign.
EA Help · Open official guide ↗Operations and Tactical Missions do different jobs
Operations take place on the Galaxy Map and can grant resources, unlock follow-up work or change relationships. Tactical Missions deploy the squad into turn-based objectives. Both can expire, while story-critical work eventually becomes mandatory.
Official sources
Official release, Operator, enemy, customization, squad and tactical-combat overview.
Electronic Arts · Lucasfilm Games · Checked Aug 27, 2026Official gameplay overview for missions, the Den, Operators, bonds and customization.
Electronic Arts · Checked Aug 27, 2026Official launch answers for campaign settings, permadeath, mission types, PC support and post-launch unknowns.
Electronic Arts · Checked Aug 28, 2026Official AP, cover, hit chance, Overwatch, Advantage, Rally and permadeath rules.
EA Help · Checked Aug 28, 2026Official list of eight standard Specializations and the rules for changing Hawks and Custom Operator roles.
Electronic Arts · Checked Aug 30, 2026Official August 27 launch, platforms, editions and cosmetic pre-order information.
Electronic Arts · Checked Aug 27, 2026